


This is a second post in the JavaFX series. You can check the first post on how to set up your environment for JavaFx development.
Application composition
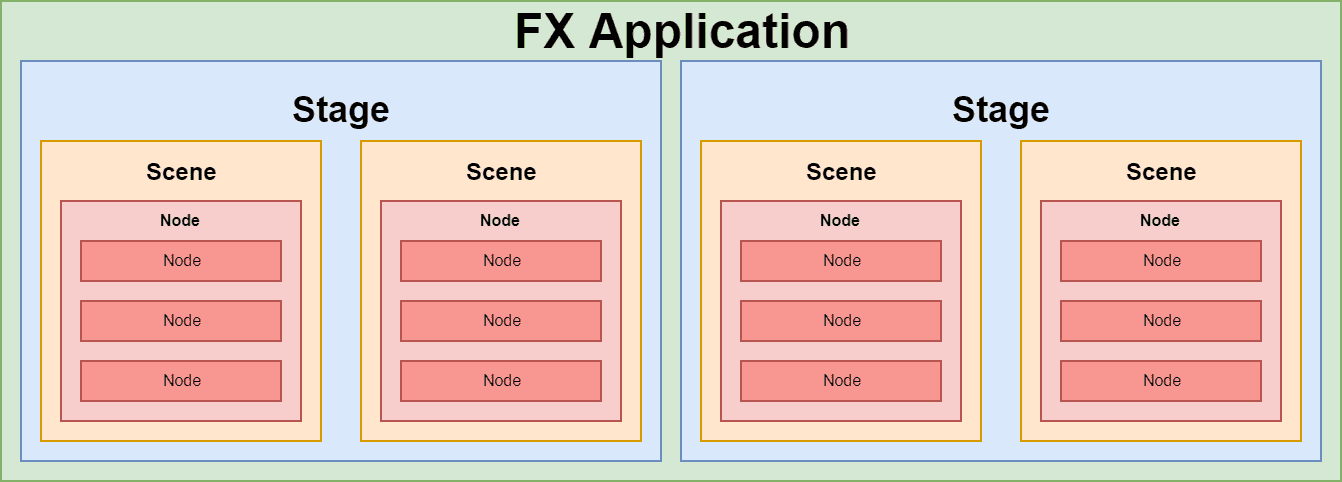
Each application consists of a hierarchy of some basic components. Stages, scenes, and nodes. Let's look at each of them.
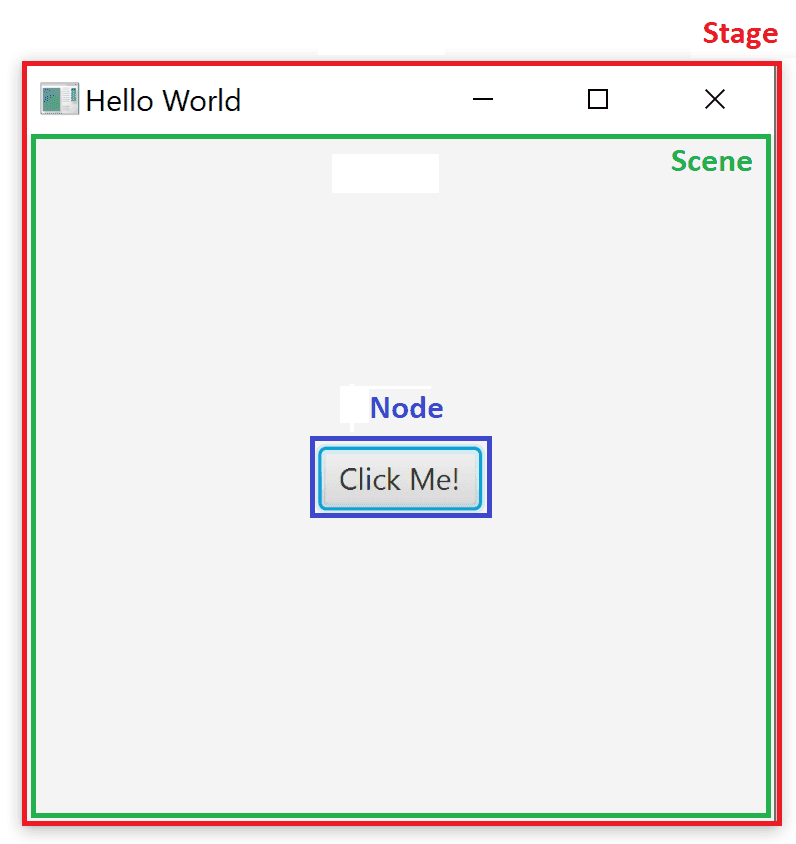
Stage
Stage basically represents a window. Your application can have multiple stages, but needs at least one.
Scene
A scene represents the contents of a stage. Each stage can have multiple scenes, which you can switch. Imagine a theater stage switching multiple scenes during a play.
Node
Each scene can contain various components, which are called nodes. These can be controls like buttons or labels or even layouts, which can contain multiple nested components. Each scene can have one nested node, but it can be a layout, which can host multiple components. The nesting can be multiple levels deep - layouts can contain other layouts and regular components.
Summary
- Each application can have multiple stages - windows.
- Each stage can switch multiple scenes.
- Scenes contain nodes - layouts and regular components.
You can visualize the hierarchy like this:
Now let's see a specific example - a real application.
Application Class
Time to start coding. If you followed the previous article, you already have all the required dependencies in place.
Each JavaFX application needs to have a main application class. That is - a class that extends javafx.application.Application.
Not only that, but you also need to override the abstract method from the Application class - public void start(Stage primaryStage) throws Exception.
Your main class can look something like this:
import javafx.application.Application;
import javafx.stage.Stage;

public class Main extends Application {

    @Override
    public void start(Stage primaryStage) throws Exception {
        // TODO implement me!
    }
}
Of course, we still need to implement the start method.
Main method
JavaFx does not necessarily need the main() method to start. You can package an executable jar using JavaFX Packager Tool. However, it is much more convenient to actually have the main method.
Not only is the application easier to start, but you can also pass command-line parameters to your application as usual.
Inside the main() method, we can launch our application using Application.launch().
public static void main(String[] args) {
    // Here you can work with args - command line parameters
    Application.launch(args);
}
You can see it is a static method in the Application class. We did not specify what our main class actually is. JavaFX is able to determine this automatically depending on the class, which calls this method.
Setting up a Stage
We are able to launch our app using main() method now. Still, nothing happens if we do so. We need a window to show. Windows are called stages, remember? As a matter of fact, we are already given the primary stage in the start method as an input parameter - public void start(Stage primaryStage). We can use this. The only problem is that it is hidden by default. Fortunately, we can easily show it using primaryStage.show().
@Override
public void start(Stage primaryStage) throws Exception {
    primaryStage.show();
}
Now when you run the application, you should see a window like this:
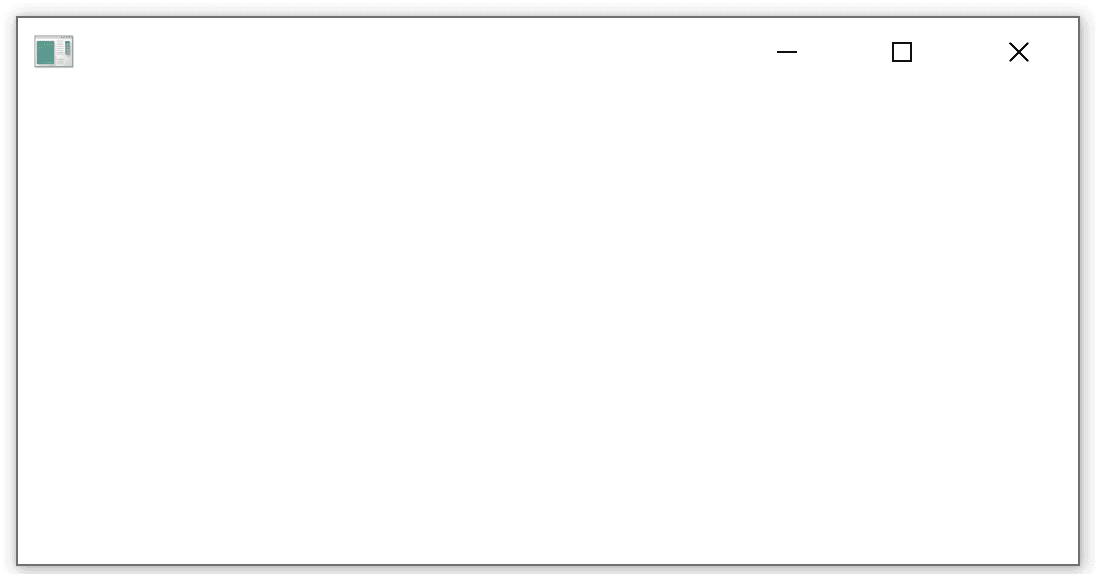
Not very impressive, right? First, let's add some nice caption to our window.
primaryStage.setTitle("Hello world Application");To make it look even better, let's add a nice icon to the window top bar:
InputStream iconStream = getClass().getResourceAsStream("/icon.png");
Image image = new Image(iconStream);
primaryStage.getIcons().add(image);
You can add multiple icons. That is, multiple sizes of the same icon representing the application. Depending on the context, the best size for your application will be used.
Now you can configure the Stage object's properties and behaviour such as:
- Setting position using
setX()andsetY() - Setting initial size using
setWidth()andsetHeight() - Limit maximum dimensions of the window using
setMaxHeight()andsetMaxWidth()or disable resizing altogether usingsetResizable(false) - Set window always on top using
setAlwaysOnTop() - Set full screen using
setFullScreen() - And many more
Adding a Scene
Now we have a window with some fancy title, but it is still empty. You already know, you cannot add components directly to a Stage (window). You need a scene first.
However, the scene constructor requires already its child node. Let's create a simple label first. Then we create a scene with this label as a child.
Label helloWorldLabel = new Label("Hello world!");
Scene primaryScene = new Scene(helloWorldLabel);
You can see that Scene only accepts one child component. What if we want more? You need to use a layout then, which is a component, that can have multiple children and arranges them on the screen depending on the layout used. We'll cover layouts later in the series.
To make it slightly more visually appealing, let's center the label vertically on the screen.
helloWorldLabel.setAlignment(Pos.CENTER);Finally, we need to set the scene to the stage we already have:
@Override
public void start(Stage primaryStage) throws Exception {
    primaryStage.setTitle("Hello world Application");
    primaryStage.setWidth(300);
    primaryStage.setHeight(200);

    InputStream iconStream = getClass().getResourceAsStream("/icon.png");
    Image image = new Image(iconStream);
    primaryStage.getIcons().add(image);

    Label helloWorldLabel = new Label("Hello world!");
    helloWorldLabel.setAlignment(Pos.CENTER);
    Scene primaryScene = new Scene(helloWorldLabel);
    primaryStage.setScene(primaryScene);
    primaryStage.show();
}
Now our window contains a scene with a label component.

What's Next
In the next step in the series, we'll cover how to write our GUI in XML rather in Java.
